Using rollers and brushes to paint your house is an exhausting task and you risk painting certain parts unevenly.
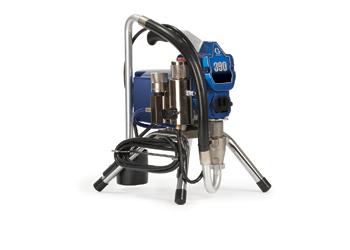
Airless paint sprayers make the job faster and cleaner. Instead of air, this tool makes use of a very high pressure of up to 3,000 psi to pump out the paint.
The paint goes through a hose and out through a fine tip that releases the paint in a fan-shaped mist.
It’s important to know that there will be some paint particles that will just drift off into the air and won’t actually make it to the surface that you’re painting.
Cleaning and Priming the Pump
As with any home improvement task, some prep work is required. Clean the screen that you can find near the sprayers intake point.
You also have to clean the filters near the pump and in the gun. It is also important to have the paint pass through a strainer to get rid of any lumps that could clog and block the filters.
To start the priming process, you will need two pails, one filled with the strained paint which will have the suction tube in it, and another empty waste pail which will have the smaller prime tube in it.
Once you’ve done this switch the valve that says “prime/spray” to the prime position and turn the pump on. Turn up the pressure and wait for the paint to pass through the tube designated prime.
Once this happens, clip the two tubes together and put them in the paint pail. Leave the pump running for about half a minute or until air bubbles stop coming out of the tubes.
You may have to repeat this process when you change buckets of paint.
Filling the Hose
Take the gun, remove the tip and guard and point it towards the waste pail. Pull the trigger and switch the valve to “spray” and wait until a steady stream of paint is flowing from the gun.
Once this is done, you have to lock the trigger so you can relieve the pressure. Start out with turning off the pump, switch the valve to prime, point the gun to the side of the pail designated for waste and pull the trigger.
The pressure will be released once you pull the trigger. You should then utilize the trigger lock.
Now attach the guard and place the tip in the appropriate direction and angle. Make sure that both are locked tight.
Adjusting the Sprayer’s Pressure
Make sure to adjust the pressure of your sprayer to keep the coats even and prolong the life of your tips.
Uneven streams of paint could mean that your pressure is too low. Having the pressure too high can wear out your tips too fast.
If you’ve set it at its highest pressure and the paint is still uneven, you might have to consider changing tip sizes or checking if you have to replace the tip completely.
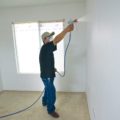
Painting your House
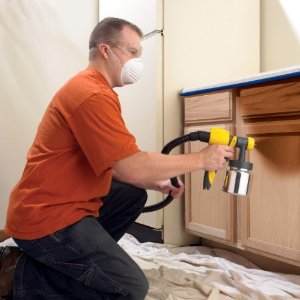
Before anything else, make sure that you’re wearing work clothes and that you have a mask on.
Painting the second story of your home can make the mist travel and land on other things so it’s best to place covers or block things that shouldn’t get painted on. This includes plants, cars, fences, and your neighbors’ property.
If it’s your first time using the airless paint sprayer, practicing on a scrap piece of wood would be ideal. Keep your arms and movement straight.
Paint horizontally across the area keeping your arms and hands parallel with the area. A curved paint stream could make it difficult to apply the next stream of paint. Keep moving at a consistent pace and don’t linger on each area for too long to avoid excess trails.
Clean Up
Make sure that you clean the sprayer after use to avoid dried up paint clogging the hose, pump, and gun. Run a solvent through the sprayer the same way you would with paint.
Practicing before doing a paint job would be a really good idea. Getting to know the tool and its parts can also help you in trouble shooting. Airless paint sprayers can be difficult to use at first but once you get the hang of it, painting will be a breeze.